It was probably a bad idea to make a blog title that's a made-up word spanning two languages ... nobody knows how to spell this.
All my creative projects not related to surface patterns will be at Tourmaline Tigers. Everything pattern related is still at 365 Days of Pattern.
Thursday, February 26, 2015
Sunday, August 11, 2013
New Mexican Vegetarian Christmas Enchiladas
My friends got together for the Breaking Bad premier, and I made New Mexican food to go along with the blue rock candy on the menu. Around August or September, we get a fresh crop of Hatch green chiles at the grocery stores. They roast them in big drums and I usually stash a few bags in the freezer to last year around. If you don't live in the southwest, you can also find the chiles canned.
1 onion, diced
3 cloves garlic
1 bunch fresh cilantro, finely chopped
1 lb. white mushrooms, sliced
1/2 cup roasted hatch green chiles, seeds removed, & pureed
flour tortillas
1 lb. shredded cheddar cheese
2 15 oz. cans Hatch red enchilada sauce
Iceberg lettuce

Preheat oven to 350 degrees.
Filling:
Sauté onions until clear over medium heat. Add mushrooms and cook until beginning to wilt. Then add garlic, 2/3 of cilantro, and green chiles, and cook another 5 to 10 minutes.

Set aside 1/3 of the cheese for the topping. Fill tortillas with filling and and cheese, then roll them up and lay them in a casserole pan. Pour red chile sauce over top, then add remaining cheese and cilantro. Bake for 1 hour. Serve with iceberg lettuce.

1 onion, diced
3 cloves garlic
1 bunch fresh cilantro, finely chopped
1 lb. white mushrooms, sliced
1/2 cup roasted hatch green chiles, seeds removed, & pureed
flour tortillas
1 lb. shredded cheddar cheese
2 15 oz. cans Hatch red enchilada sauce
Iceberg lettuce
Preheat oven to 350 degrees.
Filling:
Sauté onions until clear over medium heat. Add mushrooms and cook until beginning to wilt. Then add garlic, 2/3 of cilantro, and green chiles, and cook another 5 to 10 minutes.
Set aside 1/3 of the cheese for the topping. Fill tortillas with filling and and cheese, then roll them up and lay them in a casserole pan. Pour red chile sauce over top, then add remaining cheese and cilantro. Bake for 1 hour. Serve with iceberg lettuce.
Wednesday, February 27, 2013
365 Days of Pattern
Hi there,
Just wanted to let you know I've started a new blog called 365 Days of Pattern. I will still update this blog here and there, but my new blog will be a daily project so there should be lots of fun posts. Please check it out :)

Just wanted to let you know I've started a new blog called 365 Days of Pattern. I will still update this blog here and there, but my new blog will be a daily project so there should be lots of fun posts. Please check it out :)
Wednesday, October 31, 2012
Mega Allsorts Halloween Costume
This year I got some Kiwi inspiration for my Halloween costume. On my second day visiting New Zealand, I discovered a colorful candy:

And so the idea began. I found a fabric store and bought 2m (We're going metric now!) of interfacing (a stiff fabric for structural support), and 1m each of pink, white, and yellow cotton. Fabric (and most material goods) are quite expensive here, as everything must be shipped to the end of the earth. I have no patterns and no sewing machine. I buy needles, thread, pins, and a measuring tape. The dull kitchen shears will have to do as nice sewing scissors are almost $50 NZ. My plan is just to do the best I can with the time and materials I can. I started by cutting panels of interfacing for the sides and top of the costume:

I then arrange the fabric sections over the interface panels and pin everything in place.

I also cut out a top panel and set it aside.

I start to join the fabric to the panels by sewing zig-zags, which will demarcate the colored sections. Eventually these stitches will be covered with black ribbon for the liquorice stripes.

Lining up the pieces to check my work:

I sew three rows of zig-zags and then trim the fabric scraps. Now it's time for liquorice stripes:

Yay, they have tacky glue at this fabric store. It works well for crafts and dries clear. I fold the ribbon over itself for the zig-zags:

It's starting to come together. I leave long trails of ribbon so I can extend them to the neighboring panel. Ideally it will look like one continuous band.

The best way to sew things is to sew inside-out, so you hide the stitches. I laid the adjacent side panels face to face, then pinned them together. Then, I hand-sewed them together about 1/2 cm in. (Sorry I forgot to photograph this step). Here is the finished result when unfolded:

I continued sewing all four panels into a rectangular prism. This part was very tedious, so I watched a lot of television and completely forgot to take photographs. Sorry. The key point is to make sure all your stitches are hidden on the inside -- this is why you work inside-out. I sewed the top on, then flipped the whole thing. The final step was to cut holes for my head and arms.
Another bit of Kiwi inspiration came from all the fascinators seen at department stores for Cup Week fashion. And thank you tacky glue for adhering to allsorts without dissolving them.

And here's the finished piece, with yellow leggings and some faint purple hair coloring.


Fun facts: Construction time: 11 hours
Approximate cost: $72 NZ for fabric and materials + $13 NZ for yellow-green leggings + $19 NZ for glittery yellow Revlon nail polish (I'm not kidding, they shipped it through Australia to bring it here) + $25 NZ for hair dye = $129 NZ ~ $105 US
Monday, October 8, 2012
Nyan Cat Cake
For my 28th birthday I made a cake inspired by the notorious Nyan Cat. My inspiration for this project came from Lydia Bakes. The cake is the orange chiffon cake from Tartine. It's easy recipe and forms a very level cake. I used raspberry jam and the Quick White Icing I from Joy Of Cooking, using Cointreau for flavor. Then, for a complete 180 from the Tartine aesthetic, I used colorful fondant for my 8-bit cat. Wilton makes nice packs of multiple colors, and I did a little color-mixing to get the greys. (For those of you in Austin, Make It Sweet is a nice local business that sells baking supplies.) Instead of cutting out each piece for the rainbow trail, I rolled out individual colors into snakes, lined them up, then rolled them flat into a rainbow. I dampened the surface and applied edible glitter. The final touch was french dragees for the stars.


Sunday, December 4, 2011
Archetypes of Female Martial Artists
This semester, I took a class called "Everyone was Kung-Fu Fighting: East Asian Martial Arts Films." Yes, I'm getting college credit for this. I thought I'd share my group's final project -- a short video investigating the roles of women in martial arts films. Enjoy!
Sunday, November 13, 2011
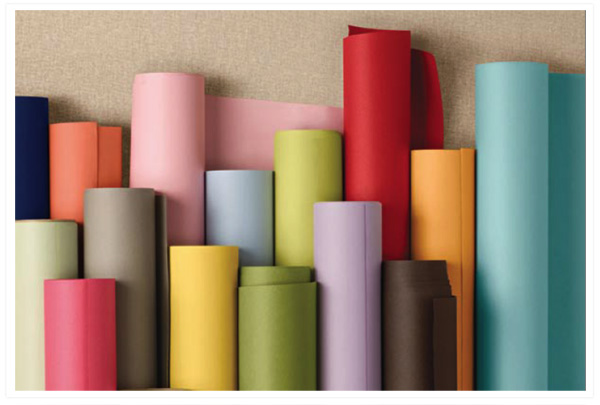
Birthday Present Wrapping
I just had a lot of fun wrapping presents for my boyfriend's birthday. I picked up some fun papers at Paper Place: "heroes and villans," sneakers, and sushi.


I also got some solid red and black wrap from waste not paper. It's nice, heavy, and smooth, great for gift wrapping.


Since the boxes were fairly large, I couldn't use the decorative paper for the full box. I ended up cutting it into strips, then experimenting with washi tape and black ribbon. I used a lot of black, red, and grey tapes, and a hint of the thin green striped tape.
Here is the final result!


Subscribe to:
Comments (Atom)